November Zero WordPress Theme

Installation

You can install theme either with Admin Panel or using FTP clients like FileZilla.

Using Admin dashboard

  1. Log in to the WordPress Administration Panels.
  2. Go to Appearance -> Themes.
  3. Select Add New.
  4. Then select Upload Theme.
  5. Click Browse and locate november-zero.zip Theme in your computer.
  6. Select november-zero.zip and click Install Now.

Using FTP

  1. Unzip november-zero.zip to your Desktop.
  2. Using an FTP client to access your host web server, go to /wp-content/themes/ and upload your new copy of November Zero Theme.
  3. Now, log into the WordPress Dashboard with your login details.
  4. Select the Appearance panel, then Themes.
  5. You will see the theme in the list.
  6. Then click Activate button.
  7. Now the theme will be activate and go through the following options to set up the theme step wise.

Activation

After successfully installing the November Zero theme, you need to activate your theme. Follow given steps to activate the theme.

  1. Select the Appearance panel, then Themes.
  2. You will see the November Zero theme in the list.
  3. Click Activate button.
  4. After clicking in activate button the theme will be activate.

Starter Sites/Demo Import

Import Starter Sites or Import Demo Content

Importing a Starter Site for November Zero WordPress theme is quite easy tasks. First you have to install & activate the November Zero theme and install recommended plugins. Then, please follow following steps:

  • Go to appearance -> Starter Sites
  • You can see many demos for Mantranews Theme
  • Choose best suitable ready-made site demo and click on import button.
  • Wait for sometime, it’ll take 2/4 minutes. But time might be vary due to server speed and other external stuffs.
  • You can check following image to know about Starter Sites.

Front Page Setup

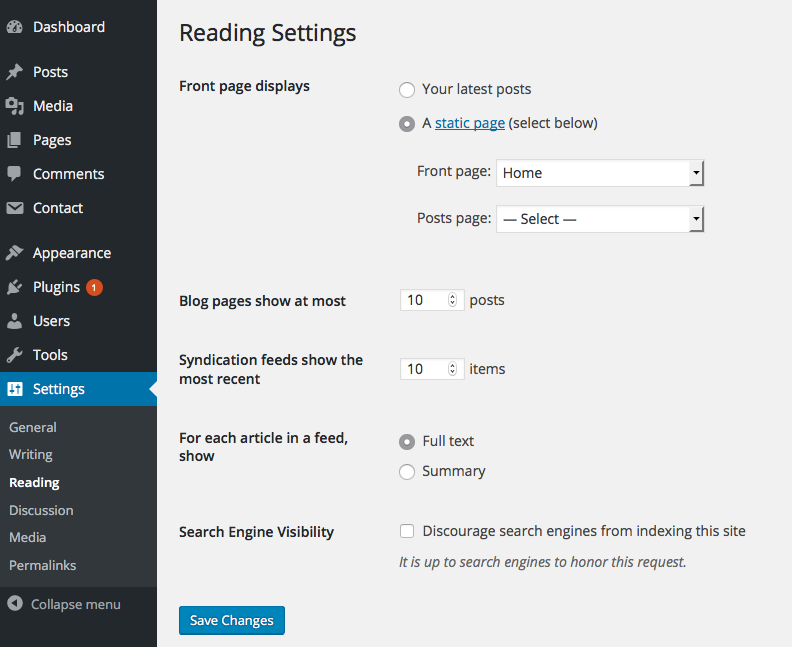
Create your new page and give it a name, e.g : Home. . Select Page Template as Home under page attribute.

Go to Reading -> Settings and change your front page to the Home page you recently created above.

Front Page Sections

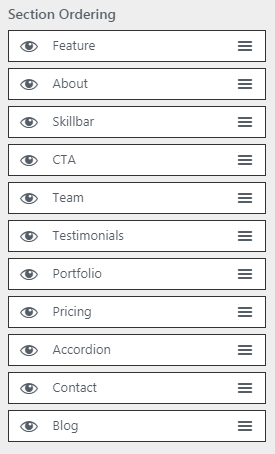
Section Ordering

Go to Appearance > Customize > Section Ordering >Section Ordering. Now You can change sections position by drag and drop

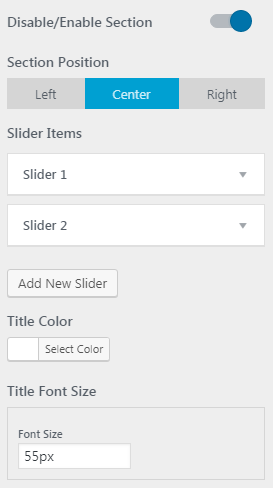
Slider Sections (only in Pro).

Go to Appearance > Customize > FrontPage Options >Slider Section.

You can add sliders , change colors , font sizes , links etc .

Big Title Section

Go to Appearance > Customize > FrontPage Options >Big Title Section.

You can add Banner image , change colors , font sizes , links etc .

About Section

This section is little bit different . First you need to add a page eg: about . Then add content and featured image . And Select About Page on this setting . Page content and featured image appears after choosing page . Here are options to chage title , color , size , background etc.

Go to Appearance > Customize > FrontPage Options >About Sections.

Contact Section

This section is Just like About . First you need to add two pages eg: Contact Details/contact form . And Select Page for Contact form and Select Page for Contact Details. We recommend you to install contact form 7 for contact form . Whatever you write on page it appears in this section after choosing page . Here are options to chage title , color , size , background etc.

Go to Appearance > Customize > FrontPage Options >About Sections.

Now all other sections can be easily added from this sections .

Site Title, Tagline & Logo

  1. Go to Appearance > Customize > Site Identity
  2. Click on Select Logo
  3. Select the logo.
  4. After logo selected, your site title and tagline will hide on the front end.
  5. If the preview is fine, click on Save & Publish to save the changes.

Background Image

  1. Go to Appearance > Customize > Background Image
  2. Select the best image for the site background.
  3. Select the required setting for background.
  4. Publish to save the changes.

Adding Posts

To create the posts on your site, Follow the below-listed methods.

  1. Go to Administration Panels
  2. Go to Posts and Click on Add New
  3. Enter the title of the post and add the content
  4. Set the featured image for the post from the right corner.
  5. Set Category of the post.
  6. Click on Publish Button.
  7. Add more post like the above methods.

Categories

To create the categories on your site, Follow the below-listed methods.

  1. Go to Administration Panels
  2. Go to Posts > Categories
  3. Give the title of the category
  4. Click on Save
  5. The added category will appear on the Add Post Page.

Adding Pages

To create the pages on your site, Follow the below-listed methods.

  1. Go to Administration Panels
  2. Go to Page and Click on Add New
  3. Give the title of the page and add the content
  4. Set the featured image for the page from the right corner.
  5. Click on Publish Button.
  6. Add more page of the above methods.

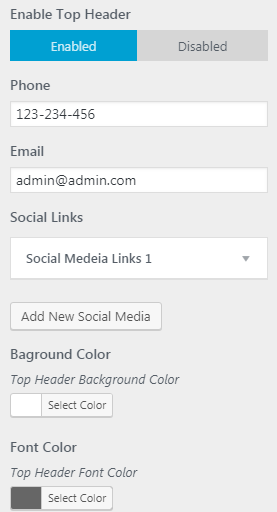
Top Header

Here are options to change top header address and social media links with color and size options

Go to Appearance > Customize > Theme options > Top Header

Now You can change everything as per your requirements

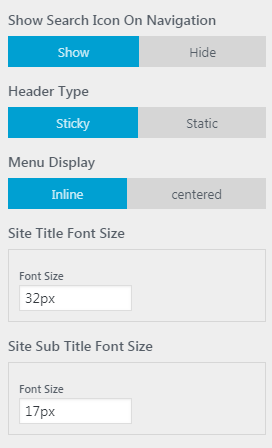
Menu Setting

Here are options to change Menu types Sticky and Static , Menu display Inline and CenteredFont Size and Background of Header

Go to Appearance > Customize > Theme options > Menu Setting

Now You can change everything as per your requirements

Menus

This theme comes with three menu locations. Primary Menu Secondary Menu and Social Menu

Primary Menu

  1. This menu will appeared as Main navigation for the site.
  2. Create a menu and add the items on the menu.
  3. Set the menu on the Primary Menu.
  4. Save the Menu

Sidebar Setting

Go to Appearance > Customize > Theme options > Sidebar layout. Select sidebar layout for your site.

Footer copyright

Go to Appearance > Customize > Theme options > Footer copyright. Enter copyright text of your site.